1. Introduction
1. Introduction
2. The Lab Environment
3. The Migration
…3.1 Migrating the Domain Controller
In this post I will explain how to migrate several roles (Active Directory Domain Controller, DNS Server, DHCP Server, WINS Server) from Windows Server 2003 (WS2K3) to Windows Server 2012 (WS2012).
Fortunately for everyone, it is not necessary to go through Windows Server 2008/R2 (WS2K8/R2) to do this.
Because it is fairly common (although not recommended) to see small organizations with several roles in the same server, I will assume this is the case and build this lab with only one Windows Server 2003, and only one Windows Server 2012. Of course these roles could be distributed in several different servers.
BE WARNED:
You must make sure that your domain functional level and your forest functional level is updated to WS2K3 and it is not in Windows Server 2000 (WS2K). Otherwise it will not work.
You can raise the Domain Functional Level from the Active Directory Users and Computers management console, and the Forest Functional Level from the Active Directory Domains and Trusts management console, as shown in the following image .
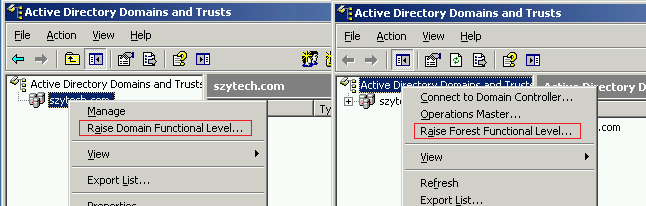
Note that to raise the domain functional level you must right click the domain item (in this case szytech.com), and to raise the forest functional level you must right click on the Active Directory Domains and Trusts item.
2. The Lab Environment
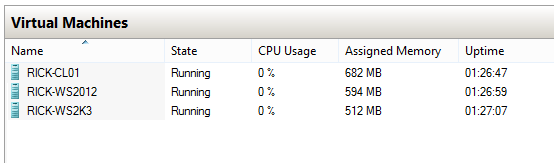
I have set up 3 virtual machines, one client (RICK-CL01) with Windows 8, and two servers, RICK-WS2k3 with the roles specified above (AD DC, DNS Server, DHCP Server and WINS Server) already configured, and a brand new install of Windows Server 2012 (RICK-WS2012).
The client is already registered in the domain
Set up the WS2k3 domain controller with a fixed IP address (in this example we are going to use 192.168.2.1).
The domain we will be using is szytech.com
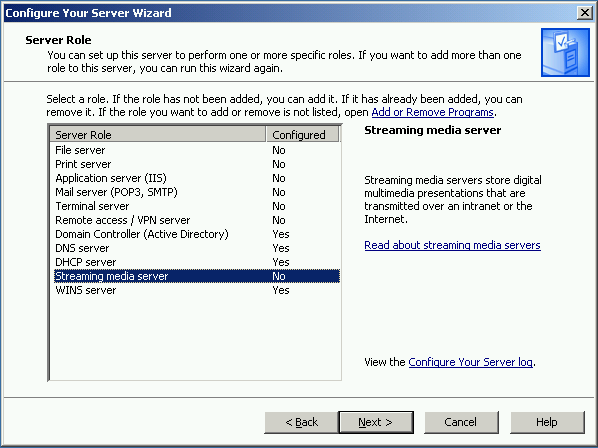
So we will open our Windows Server 2003 VM and check out the current active roles:
To add a couple of things and show the migration actually works, I am going to add a couple of users. Because I am very creative I will name them Jane Doe (jane.doe) and John Doe (john.doe). You should go ahead and add a couple of groups if you want and whatever else you want to migrate in your actual domain.
3. The Migration
Note that you cannot do an in-place upgrade of Windows Server 2003 to Windows Server 2012, and while it is possible to do so from WS2k8 r2, it is usually adviced to do it side-by-side.
First things first.
After installing Windows Server 2012, let’s start by adding the WS2012 to the domain.
To do this we:
- Open the Server Manager
- Click on Local Server
- Click where it says Workgroup
- Click the Change… button where it says “To rename this computer or change its domain or workgroup click Change”.
- First name the server DC2012
- Next select Domain from the groupbox and type your domain name. In this case, we will type szytech.com. This should result in a dialog box asking for an authorized username
- It will ask you to restart your computer, so go ahead.
Done!
3.1. Migrating the Domain Controller
We are going to migrate de Global Catalog AND the DNS Server (only those ones that in this step.
A few considerations regarding migration of Active Directory:
- Migration is straight forward as long as your schema has not been modified (no added attributes). If this happened then you must be careful because it might cause problems with newer versions if new fields added in a newer version have the same name as the fields your applications have added. This should be tested before going into production servers.
- DNS Zones that are not integrated into Active Directory will not be migrated and should be transfered manually. This post includes how to do this, here.
So ahead we move with the Migration of the Domain Controller.
To do this, we will first promote our newly added server to a Domain Controller.
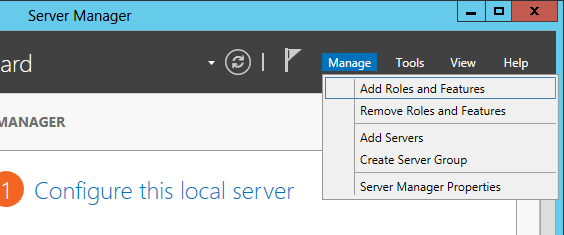
- At the server manager click Manage/Add Roles and Features
- Next follow the wizard and when you arrive at the Server Roles step, check Active Directory Domain Services
- Click Next
- When asked to add required features, click on Add Features
- Click Next twice until you get to the Confirmation step
- Check the “Restart the destination server automatically if required” checkbox
- Install
After the installation is complete, we are ready to promote the server to a domain controller.
We can do this from three different places, choose the one that suits you best: straight from the installation window, from the notification flag, as shown in the following figure, or through the AD DS tab.
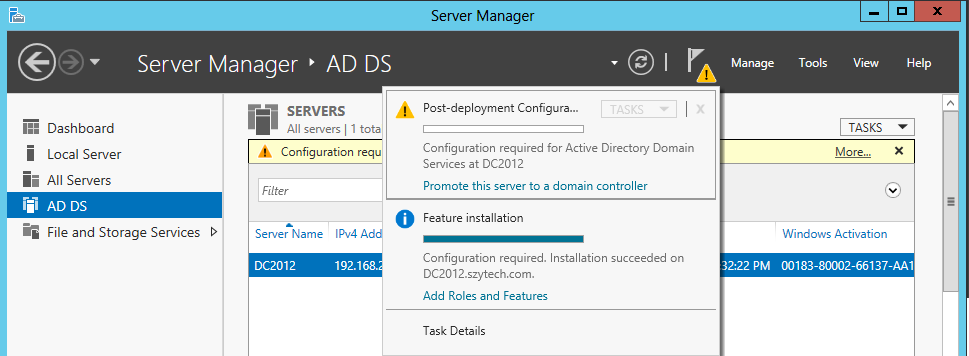
- Click Promote this server to a domain controller
It should open the following wizard
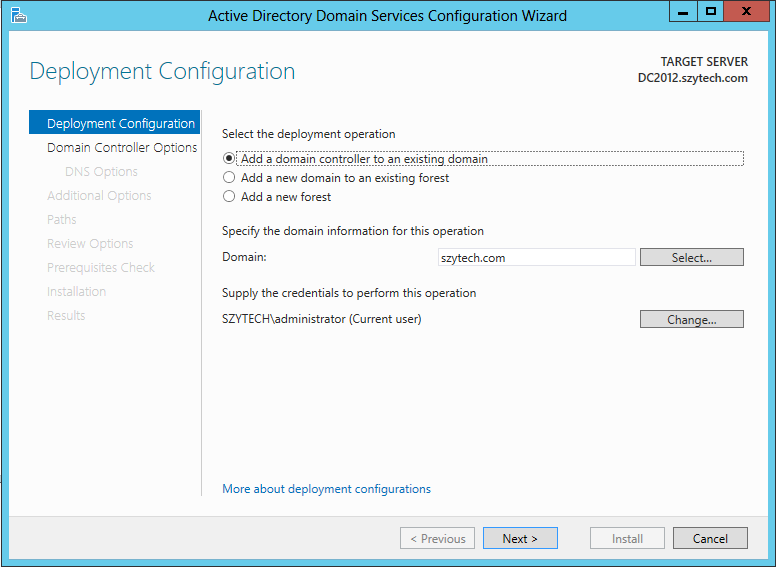
- Select “Add a domain controller to an existing domain”
- Domain: szytech.com (for this tutorial)
- Select the appropiate credentials (enough permissions)
- Click Next
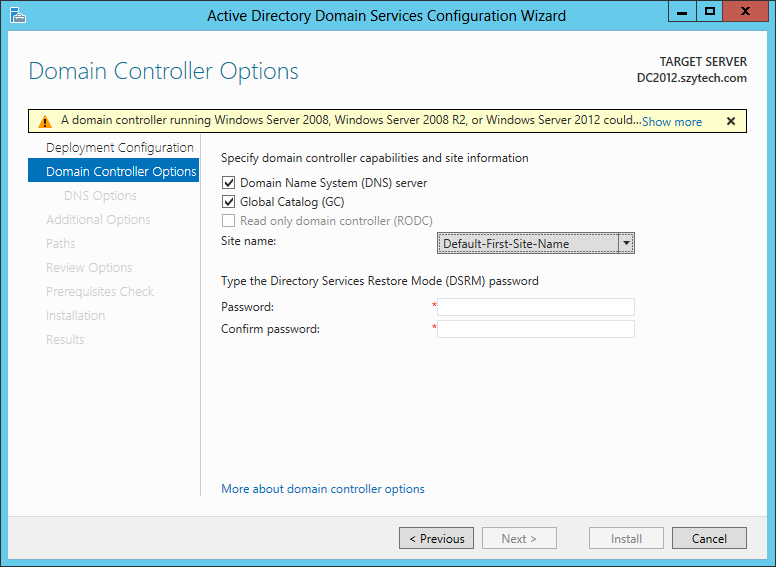
In the above image, the warning states that because there is no Windows 2K8+ Domain Controller, we cannot make this server a Read-Only Domain Controller, but nothing to worry about for now, because this is not what we need.
- Check “Domain Name System (DNS) server”.
- Check Global Catalog (GC).
- Select the appropiate Site name (in this case we will go for the default, Default-First-Site-Name)
- Type the DSRM password. Because we are very original, we will type password1!.
- Click Next.
- Ignore the DNS Options part, it doesn’t apply right now. Click Next.
- We are going to replicate the information from the Windows 2K3 server (DC01) so if you are following this tutorial step by step, choose that one. Click Next.
- We are leaving the default paths. Click Next.
- Review that all the options are correct. Next.
- It’s going to check that all the prerequisites are OK.
- Install!
If everything goes well we should see the following:
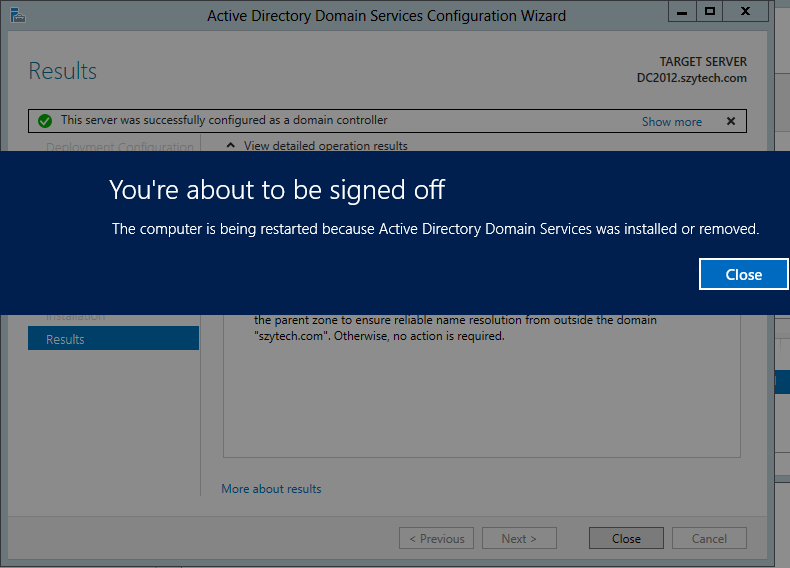
- Close and restart.
- Log-in
- Take a look at the server manager. Does it look like the following?
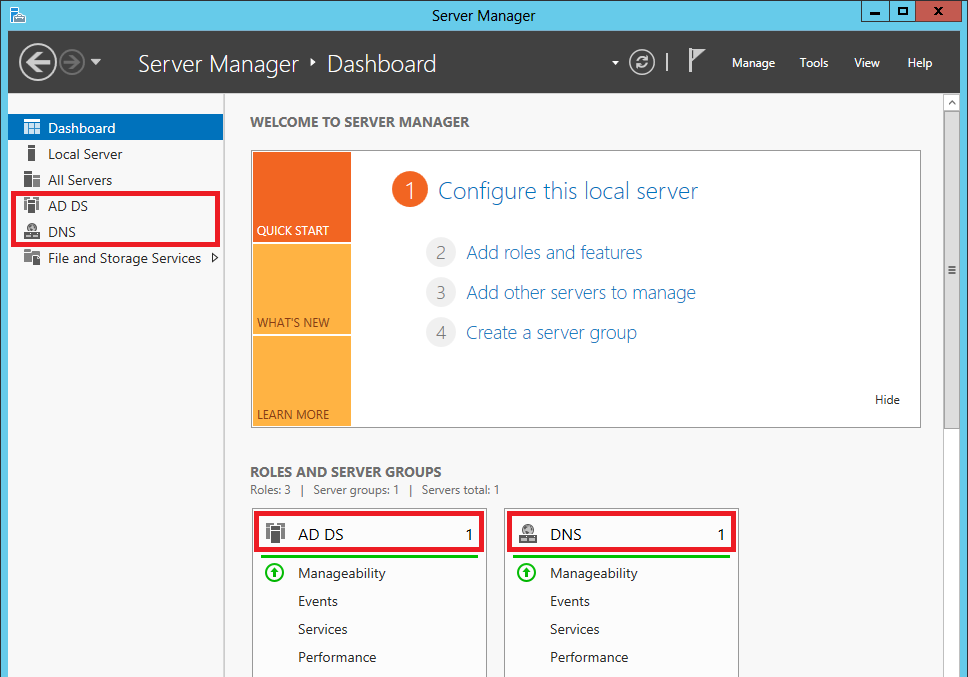
If you do then… It lives!
To finish, you just need to change the Operation Masters.
There are several ways to do this, one being using the Active Directory Module for Windows PowerShell (which you can access from the Tools menu in the Server Manager console), with the following script:
Move-ADDirectoryServerOperationMasterRole -Identity “DC2012”
                                          -OperationMasterRole SchemaMaster,DomainNamingMaster,PDCEmulator,RIDMaster,InfrastructureMaster
Note that -Identity “Name” should include the name of the servers you want to migrate the Operation Master Roles.
Now just check the Active Directory Users and Computers tool which you can access from the Tools menu in the Server Manager.
Your users should be replicated (in our case John and Jane Doe are there). Also check the domain controllers.
Finally, go to the DNS manager to verify that the AD integrated zones are also here, as is the case with our result:
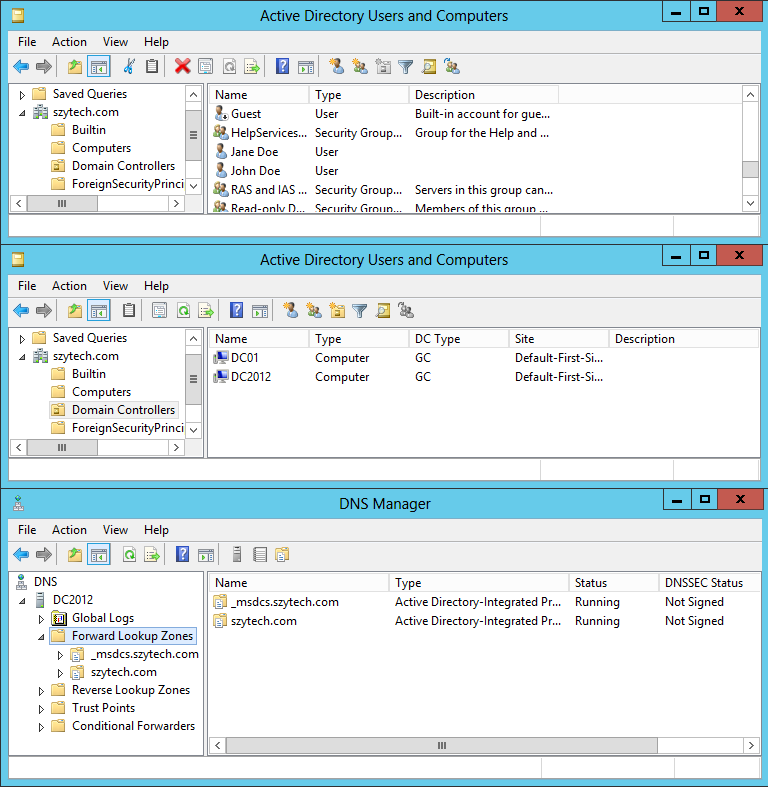
Note that those zones that are not integrated with Active Directory, do not appear.
Check out Part 2 of this series to see how to migrate all the zones in the DNS Server (those that are not integrated into AD) and DHCP Server.
Please leave any comments below!